WebDev
Introduction to Web Development
Hyper Text Markup Language
Pranshu Gupta
HTML is the standard language used to write web pages, it describes the structure and content of the page using markup. There are different elements in HTML to create represent different components of the page. These elements are represented by HTML Tags. These tags may have attributes that specify additional properties of the component.
The general outline of any HTML page is as follows:
<!DOCTYPE html>
<html>
    <head>
        <title>Simple HTML Page</title>
        <!-- Other meta information, scripts and stylesheets -->
        <!-- This is a comment -->
    </head>
    <body>
        Content goes here !!!
    </body>
</html>
To create, edit and test webpages we will need a text editor and a browser. I mostly use Google Chrome and Firefox. VS Code and Sublime Text are great text editors available for free.
HTML Tags & Attributes
<tagName attributeName="attributeValue"> text content </tagname>
All the components of a web page, such as headings, paragraphs, images, hyperlinks etc. are described by a corresponding HTML tag. Each HTML document is enclosed with in the “html” tag. This tag contains two tags “head” and “body”. The head tag can contain more tags that describe important information like the title, author, serach keywords, icon etc. of the page.
<title>Page Title</title>
<meta name="description" content="a short description of page contents">
<meta name="keywords" content="search keywords for the page">
<meta name="author" content="Author of the page">
<link rel="icon" href="location of image file" type="image/x-icon" />
The head tag may also describe the scripts and stylesheets that are required for proper display and functionality of the page using the “script” and “link” tags.
<link href="location of the css file" rel="stylesheet">
<script src="location of the JS file"></script>
Inside the body tag we describe the content of the page using the tags for headings, paragraphs, lists, images, hyperlinks etc.
<h1>Heading</h1>
Heading
Heading
Heading
Heading
Heading
Heading
We have six heading tags h1, h2, h3, h4, h5 and h6 in decreasing order of font size.
<p>This is a paragraph. This is a paragraph. ...</p>
We can format text in HTML using tags like “b”, “i” (bold, italics respectively) as shown in the following example:
<b>Bold</b>
<strong>Strong</strong>
<i>Italics</i>
<em>Emphasize</em>
<mark>Mark</mark>
<small>Small</small>
<del>Deleted</del>
<ins>Inserted</ins>
<sub>Subscript</sub>
<sup>Superscript</sup>
Bold
Strong
Italics
Emphasize
Mark
Small
Deleted
Inserted
Subscript
Superscript
Lists can be described using the “ul”, “ol” and “li” tags. The “ul” tag is used for unordered lists while the “ol” tag is used for ordered lists. The “li” specifies individual items in the list.
<ul>
    <li>Item 1</li>
    <li>Item 2</li>
    <li>Item 3</li>
    <li>Item 4</li>
</ul>
- Item 1
- Item 2
- Item 3
- Item 4
<ol>
    <li>Item 1</li>
    <li>Item 2</li>
    <li>Item 3</li>
    <li>Item 4</li>
</ol>
- Item 1
- Item 2
- Item 3
- Item 4
We can also create tables in HTML. Following is an example:
<table style="width:100%;text-align:left">
<tr>
    <th>Country</th>
    <th>Capital</th>
    <th>Leader</th>
</tr>
<tr>
    <td>India</td>
    <td>New delhi</td>
    <td>Narendra Modi</td>
</tr>
<tr>
    <td>USA</td>
    <td>Washington DC</td>
    <td>Donald Trump</td>
</tr>
</table>
| Country | Capital | Leader |
|---|---|---|
| India | New delhi | Narendra Modi |
| USA | Washington DC | Donald Trump |
For images and hyperlinks we use the “img” and “a” tags. The location of image file is specified by the “src” attribute of the “img” tag. The “href” attribute of “a” tag specifies the URL of the page that is linked to by the hyperlink.
<img src="location of image file"/>

<a href="some url">This is a hyperlink</a>
The “img” tag has several other attributes such as “alt” which is used to specify the alternative text which should be shown if the image fails to load in the browser. Attributes “width” and “height” can be used to specify the display size of the image.
Similarly, “a” tag also has other attributes e.g. “target”, if we set the value of target attribute to “_blank”, then the linked page will open in a new tab in the browser. Otherwise, on clicking the hyperlink, the webpage opens in the same tab, thus we lose the current webpage.
Cascading Style Sheets
The style attribute in HTML tags can be used to add styling to the content. However, with larger documents this becomes messy, CSS comes to rescue in that case. We can attach identifiers to different content in the webpage using the “id” attribute and then using the identifier we can define styling for the corresponding content, in a separate file. CSS is the language in which we write stylesheets.
<p style="background-color:black;color:white;padding:2%">Hello World</p>
Hello World
To do the same thing in CSS we write the HTML as follows:
<p id="my_para">Hello World</p>
and the required CSS is (can be written in a separate file):
#my_para {
    background-color:black;
    color:white;
    padding:2%
}
We can write CSS either inside the “head” tag or in a separate file, if we choose to write it in a file (say “mystyles.css”) we will need to somehow link it to the HTML.
<!-- CSS inside head tag -->
<head>
    <style>
        #my_para {
            background-color:black;
            color:white;
            padding:2%
        }
    </style>
</head>

<!-- Linking the external CSS -->
<link href="mystyles.css" rel="stylesheet">
We can also specify styling for all paragraphs in the webpage in one go. (Similarly for other HTML tags as well).
p {
    background-color:black;
    color:white;
    padding:2%;
    margin: 1%;
    border: 1px solid powderblue;
}
We have seen how to style a particular paragraph and how to style all the paragraphs. What if we want to style some of the paragraphs in the page? In that case, we can utilize the “class” attribute of HTML tags. See the following HTML and CSS:
<style>
    .styled_para_type1 {
        background-color:black;
        color:white;
        padding:2%;
        margin: 0;
        border: 1px solid grey;
    }

    .styled_para_type2 {
        background-color:darkblue;
        color:white;
        padding:2%;
        margin: 1%;
        border: 1px solid powderblue;
        border-radius: 8px;
    }
</style>

<p class="styled_para_type1">Paragraph 1 Style 1</p>
<p class="styled_para_type2">Paragraph Style 2</p>
<p class="styled_para_type1">Paragraph 2 Style 1</p>
Paragraph 1 Style 1
Paragraph Style 2
Paragraph 2 Style 1
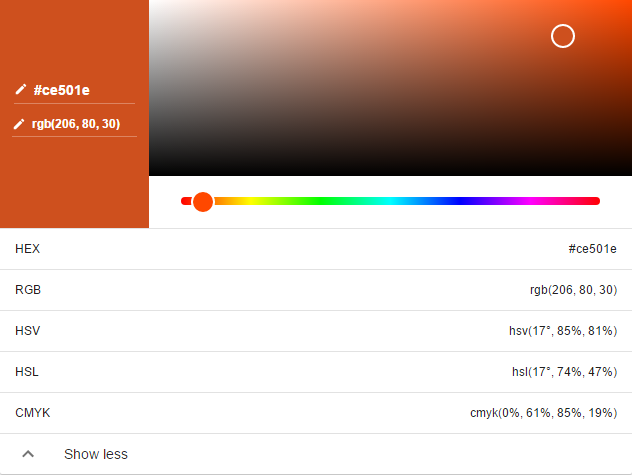
Colors can be specified in CSS by using either their HEX Code or their RGB values. Google Color Picker is a handy tool to pick your favorite color. Google Color Picker
Google Fonts is a huge library of beatiful fonts that we can use to create visually pleasing content. For example to use the “Calligraffitti” font we use the following HTML markup.
<!-- Link the Font Stylesheet in head -->
<link href="https://fonts.googleapis.com/css?family=Calligraffitti" rel="stylesheet">
<!-- use the font in some content -->
<h1 style="font-family: 'Calligraffitti', cursive;text-align:center">This is awesome!!!</h1>
This is awesome!!!
Twitter Bootstrap
Bootstrap is a free and open-source front-end web framework for designing responsive, mobile first websites and web applications. It contains HTML- and CSS-based design templates for typography, forms, buttons, navigation and other interface components, as well as optional JavaScript extensions.
To include Bootstrap in a webpage, we can either download the files and include them directly or we can rely on a CDN (Content Delivery Network) for the same.
<!-- Latest compiled and minified CSS -->
<link rel="stylesheet" href="https://maxcdn.bootstrapcdn.com/bootstrap/3.3.7/css/bootstrap.min.css" integrity="sha384-BVYiiSIFeK1dGmJRAkycuHAHRg32OmUcww7on3RYdg4Va+PmSTsz/K68vbdEjh4u" crossorigin="anonymous">

<!-- Latest compiled and minified JavaScript -->
<script src="https://maxcdn.bootstrapcdn.com/bootstrap/3.3.7/js/bootstrap.min.js" integrity="sha384-Tc5IQib027qvyjSMfHjOMaLkfuWVxZxUPnCJA7l2mCWNIpG9mGCD8wGNIcPD7Txa" crossorigin="anonymous"></script>
One of the most important features of Bootstrap is the grid layout. We can define the layout of a webpage in terms of “rows” and “columns” of different sizes using the “div” tag and “row” and “col-“ classes of bootstrap.
The HTML “div” tag is the generic container for flow content and does not inherently represent anything. It is used to group elements for purposes such as styling (using the class or id attributes), marking a section of a document in a different language (using the lang attribute), and so on.
<div class="row">
    <!-- The width of the row is defined as 12 -->
    <div class="col-sm-8">A Column of width 8</div>
    <div class="col-sm-4">A Column of width 4</div>
</div>
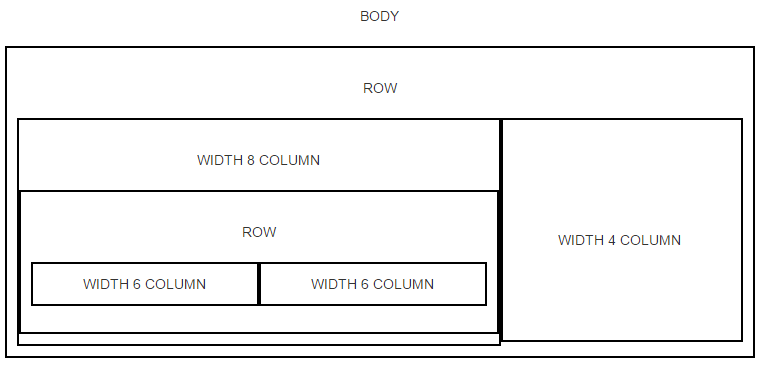
We can have nested rows and columns as well, for example:
<div class="row">
    <!-- The width of the row is defined as 12 -->
    <div class="col-sm-8">
        <div class="row">
            <!-- The width of the row is defined as 12 -->
            <div class="col-sm-6">A Column of width 6</div>
            <div class="col-sm-6">A Column of width 6</div>
        </div>
    </div>
    <div class="col-sm-4">A Column of width 4</div>
</div>
For an exhaustive description of components provided by Bootstrap visit: Bootstrap Components. You may also see an example theme here
For inspiration in web design visit Awwwards